
How to edit your product page
How to change the text and photos on your product page, show, hide or reorder sections, add a new one, change the template and colors, and save the page.
Short answer
Open the product and go to the "Page" section. Click a section in the preview to change its text and photos, manage sections in the "Sections" tab, and change the look in the "Design" tab. All changes on the page save together with the "Save" button.
In this guide
How the editor works
Open the product and go to the Page section. On the left is a panel with the Sections and Design tabs, and on the right is the page preview. Click any section in the preview to open its fields. The "‹" arrow next to the section's name takes you back to the list.
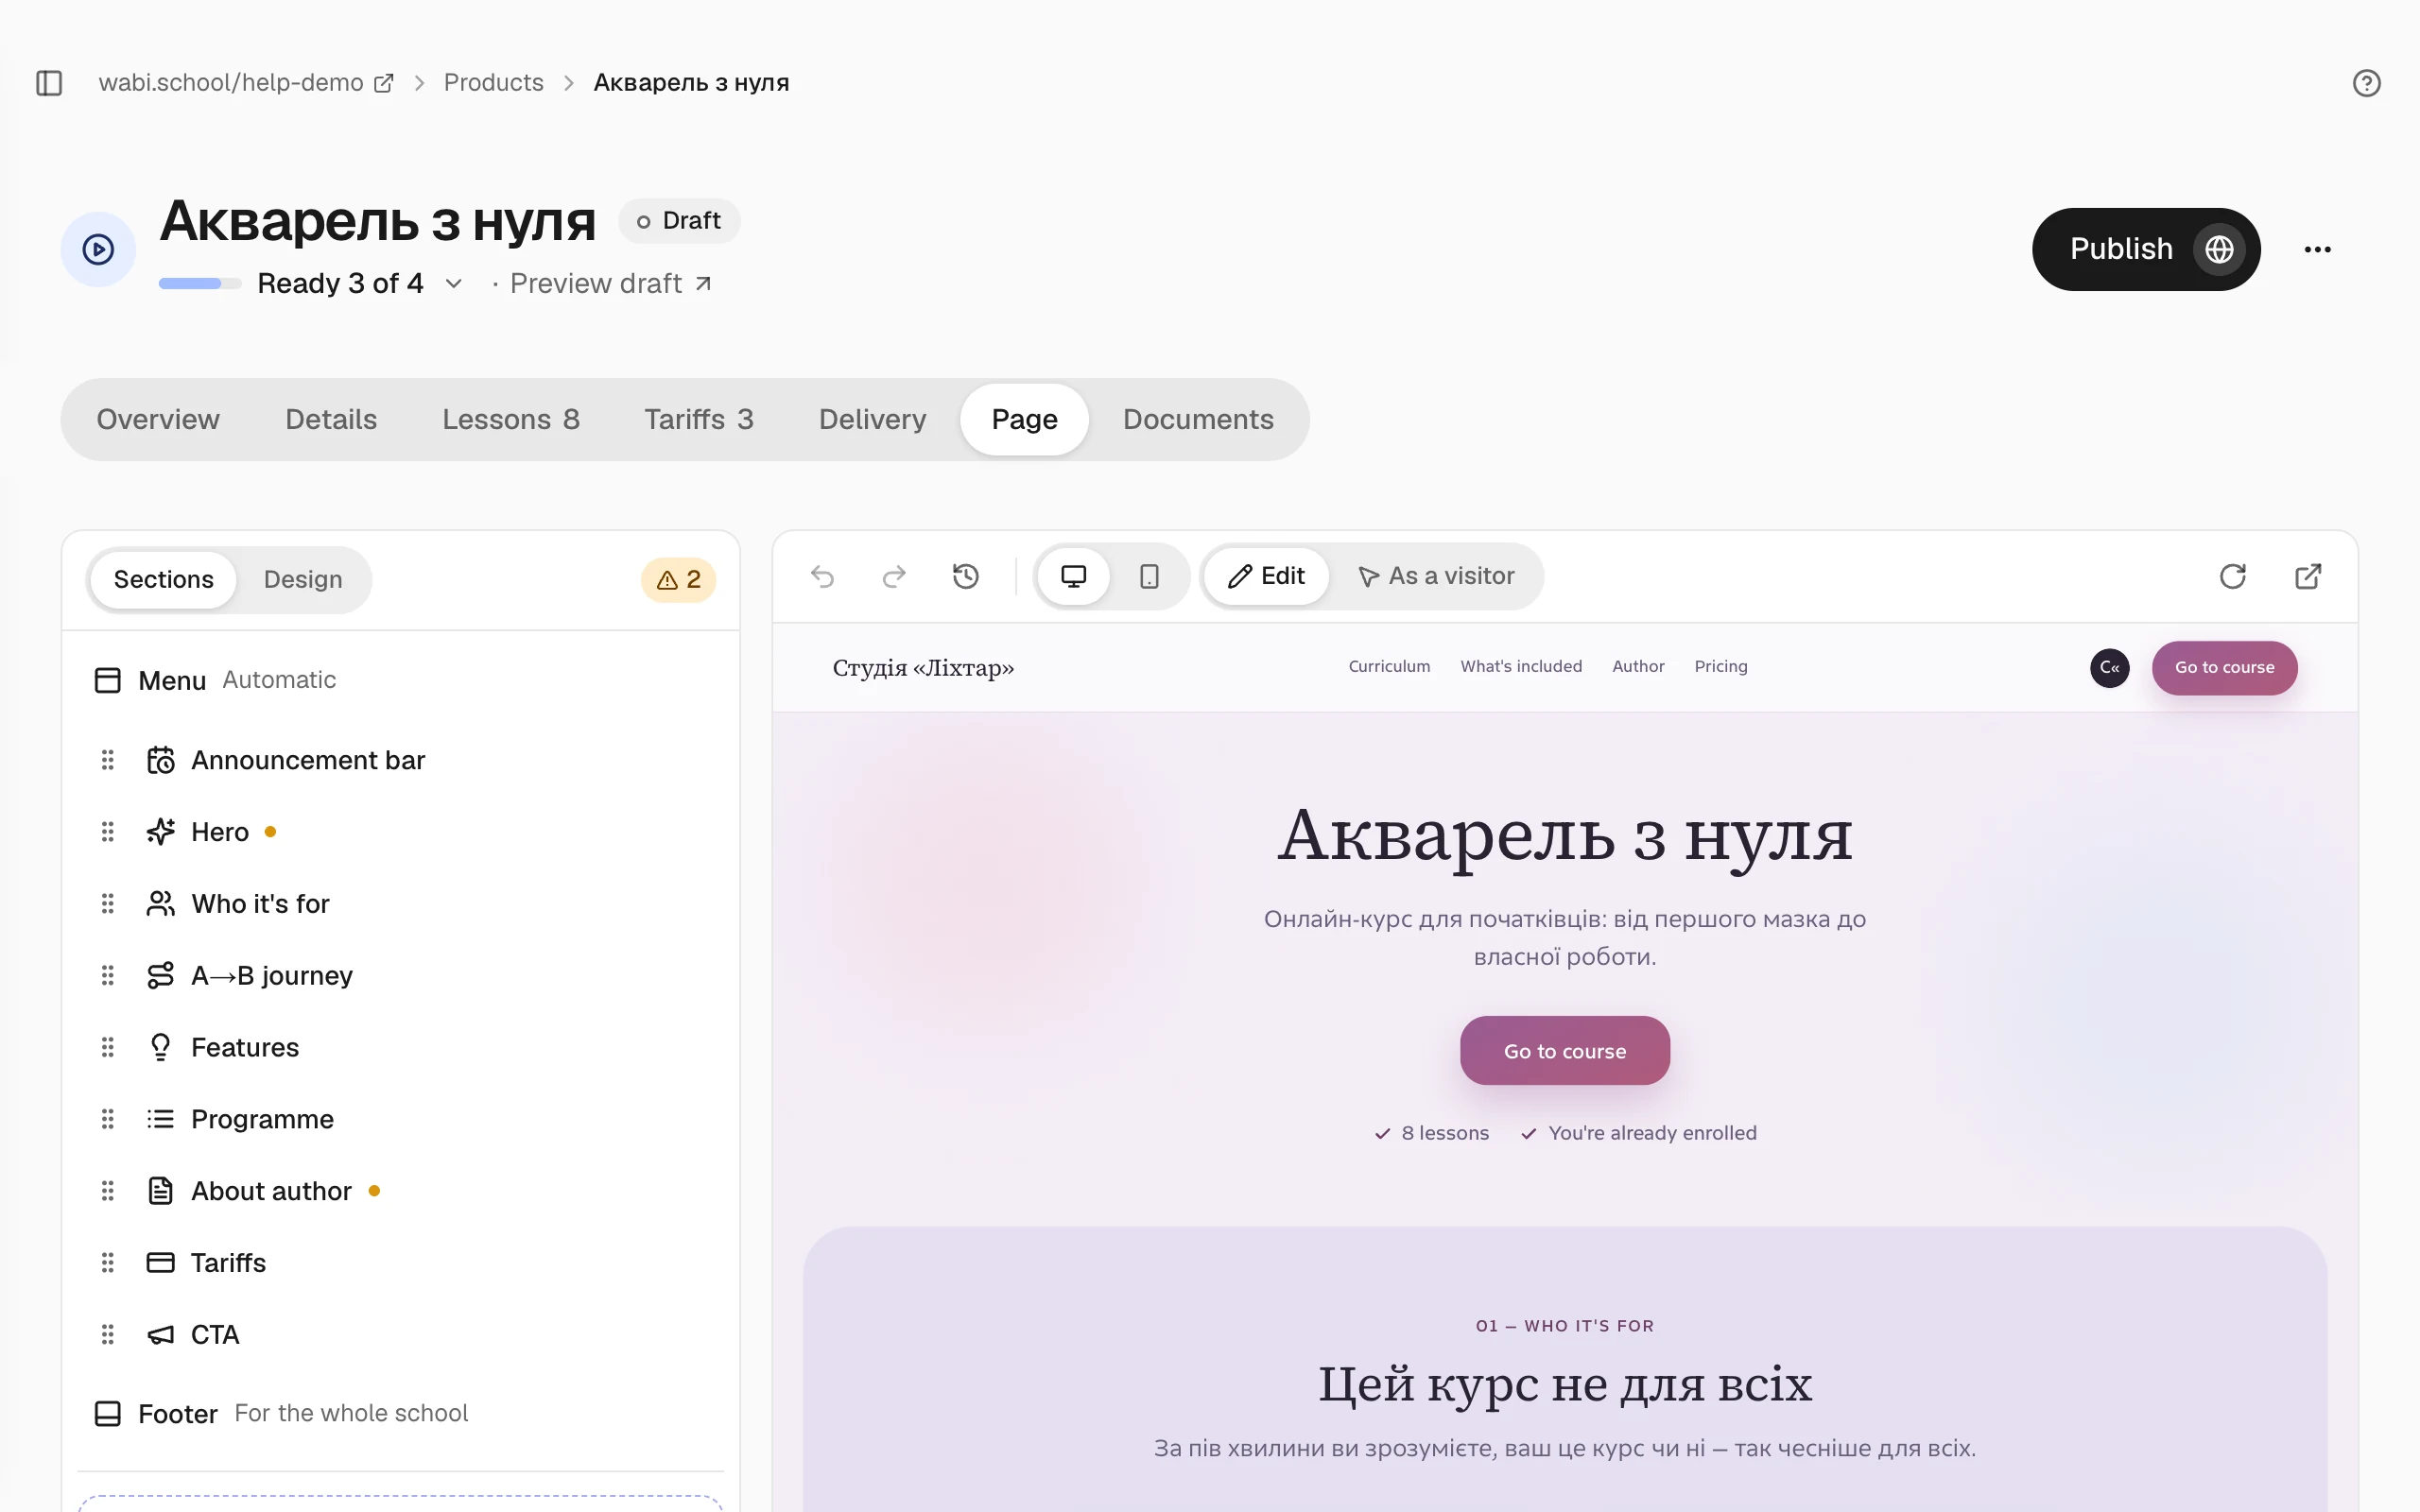
Above the preview you switch the view: Desktop, Tablet or Mobile. In As a visitor mode, buttons and links work as they do on the live page.
On the right above the preview is the field What should change on the page? Click it and describe the change in your own words: the AI shows the changes on the page, and you choose what to keep. The same window has the Write the page anew and New design with the AI agent links.
Change text and photos
- Click a section in the preview, or choose it in the Sections tab.
- Change the text in the fields and upload photos. Add a short description to every photo, because the page won't save without it.
- Check the result in the preview and click Save at the bottom of the screen.
In an open section, the text and photos are in the Content tab, and its styling is in the Look tab.
A mark next to a section in the list means there's a note about it: hover over the mark to read it, or click the notes counter above the list. Clicking a note opens that section. A red mark is a photo without a description: the page won't save until you add one.
Manage sections
- Order. Drag a section in the list, or use the Move up and Move down arrows next to the selected section in the preview.
- Hide. Click the eye next to the section in the list (it appears when you hover over the row) or in the header of an open section. Visitors don't see the section, but its text is kept and the same eye shows it again.
- Add. Add section adds a section at the end of the page. To insert one elsewhere, click "+" between sections in the preview. A photo gallery, a video, a quote and a call to action can appear more than once; tariffs, the programme, reviews and questions appear only once per page. You can add up to 12 sections.
- Delete. Use Delete section in the section's "⋯" menu, which is on its row in the list and in the header of an open section. You can bring back a deleted template section, with its text, through Add section. If you delete a section you added by mistake, Undo brings it back.
- Duplicate. The same menu of a section you added has Duplicate section, and the header of an open one also has Add to «My sections», to use it on another page.
You can't hide or delete the tariffs section, because without it nobody can buy the product. Change its prices and terms in the tariffs section: How to set up tariffs for a product.
Change the look
The Design tab starts with the On the page now card: it shows the page's template and two rows for adjusting it.
- In the Ready-made looks row, one click changes the look of the whole page without touching the text. The Another variant card puts together a new mix of colors, font and shape from the template's tested sets each time. Neither changes your own colours or the section layouts you picked; only Reset settings brings back the template's look.
- In the Customize manually row you choose a palette (or Your own colours), a heading font, corner rounding, spacing and animation.
Below, in the Templates gallery, clicking another template switches the page to it. Your text, photos and sections stay in place, and the colors, font and corner rounding carry over to the new template. If you liked the previous look better, bring it back with Undo.
Cards with the ✦ mark in the same gallery are designs from the AI agent: a click puts such a design on the page at once, without the Save button, so save or discard your other changes first.
Save the page
All changes on the page save together. While there are unsaved changes, you see Unsaved changes at the bottom, with the Discard and Save buttons. Undo fixes a mistake, and if you leave the section without saving, Wabi asks what to do with your changes. If the tab closed on its own or your session ended, the next time you open the page in this browser Wabi offers to Restore the unsaved changes.
Every save stays in the history. Click Version history to restore any earlier version. The current one isn't erased.